# Fediverse
Applications to federate your communications
# Pleroma
A lightweight server to start communicating on the Fediverse
# Install and configure yoru first Pleroma Server
## Installing Pleroma
### What is it?
With the turmoil over the past few weeks at twitter, and the non-stop invasions of your privacy from facebook, advertisers, and anyone else with any half-hair-brained idea, the world is turning to social media platforms that aren't owned and operated by a single global corporation, but instead are operated by individuals or smaller groups, and whose servers are federated (connected through linking of sorts). The “fediverse” has many applications and options for people liek us, the self-hosters, the open source advocates, to run. Pleroma is a slightly lighter weight alternative to running a full -blown Mastodon instance, and isn't too difficult to get up and running in a relatively short amount of time.
The cool thing about these federated servers, is you can join one, create an account, and still follow your favorite people from around the world regardless of which server they are on. If the server you are hosted on shuts down, there are also things in place to help migrate your profile to a new server, and keep your follows and followers intact.
Additionally, you can join a server for “local” content that is of interest to you. Tech, Open Source, Art, Dance, whatever you might be interested in, there is likely a server instance running that holds that interest as a central theme. If not, then start your own. Maybe you want an instance for your family and / or friends. It's really up to you to federate, or not federate; and up to you to determine what your theme is.
### What You'll Need
- Docker and Docker Compose
- NGinX Proxy Manager (or reverse proxy of your choice)
- A Domain Name that you own and can create A-Records for
- A Machine to install everything on, and run your Pleroma from (this can be a system in your home or business, or a VPS on a host like Digital Ocean, Linode, etc).
- About 20 Minutes of your Time
### Installing Docker-CE, Docker-Compose, NGinX Proxy Manager, and Portainer-CE
### Installation via a Simple Script
You can easily install Docker-CE, Docker-Compose, Portainer-CE, and NGinX Proxy manager by using this quick install script I created and maintain on Github. Just use the command:
`wget https://gitlab.com/bmcgonag/docker_installs/-/raw/main/install_docker_nproxyman.sh`
To download the script to your desired host.
Change the permissions to make the script executable:
`chmod +x ./install_docker_nproxyman.sh`
and then run the script with the command:
`./install_docker_nproxyman.sh`
When run, the script will prompt you to select your host operating system, then will ask you which bits of software you want to install.
Simply enter 'y' for each thing you want to install.
At some point, you may be asked for your super user (sudo) password as well.
Allow the script to complete installation.
At this point, you might want to log out and back in, as this will allow you to use the `docker` and `docker-compose` commands without the need of sudo in front of them.
*ions here*
### Install Pleroma
You need to setup a subdomain, or domain name for your Pleroma site. Create an A-record through your DNS registrar, and put the public IP address for your server location. If this is in your home, you can use a site like [http://ipchicken.com](http://ipchicken.com) to see your public IP.
Note, some ISPs block ports 80 and 443 to make it difficult to run servers from your home / work.
Once you've created the A Record, you'll also want to forward ports 80 and 443 in your router / firewall from the external internet (WAN) to the private (internal / LAN) IP address of the machine you're running NGinX Proxy Manager on.
Once the A-Record is updated in DNS, you should be able to browse to your selected subdomain or domain URL and get the generic “Congratulations” page for NGinX Proxy Manager. If so, you're doing great! We'll come back to NGinX Proxy Manager in a bit. If not, please double check your setup.
Subdomain -→ you Public IP Address -→ port 80 / 443 on your firewall -→ Private IP where NGinX Proxy Manager is running.
Be patient, as it can take anywhere from 10 minutes to 48 hours for some DNS systems to be updated.
For now, we need to clone the Pleroma repository. We can do this with the command:
`git clone `[`https://git.pleroma.social/pleroma/pleroma-docker-compose.git`](https://git.pleroma.social/pleroma/pleroma-docker-compose.git)
If you get an error about the git command, you can install git with the commands:
Debian / Ubuntu
`sudo apt install git -y`
Fedora
`sudo dnf install git`
OpenSuse
`zypper install git`
Arch
`pacman -S git`
Once you've cloned the repository, we'll want to edit a few files inside the repository folder. Move into the folder with the command:
`cd pleroma-docker-compose/`
And open the pleroma.env file with the nano text editor using the command:
`nano environments/pleroma/pleroma.env`
In this file, you should change a few things.
```text-plain
DB_USER=pleroma
DB_PASS=
DB_HOST=pleroma-db
DB_NAME=pleroma
INSTANCE_NAME=Pleroma
ADMIN_EMAIL=
NOTIFY_EMAIL=
PORT=4000
```
In the above file, you need to replace the items surrounded with greater than and less than signs “<” and “>” with the information for your Pleroma site. Once done, save with CTRL + O, then Enter, and exit with CTRL + X.
Next, we need to edit the Pleroma-db environment file: We will open it in nano with the command:
`nano environments/pleroma-db/postgres.env`
And, again, change the value for your Pleroma db to be the exact same as the value you entered in the pleroma environment variable file, and save with CTRL + O, then Enter, and exit with CTRL + X.
Now, let's edit our “docker-compose.yml” file slightly. We'll open it with nano again using the command:
`nano docker-compose.yml`
Edit the ports for the Pleroma web page if needed, but if you want to reach the site from a machine other than the one you are creating Pleroma on, you need to remove the
`127.0.0.1:`
from the mapping of the port for the “pleroma” service only. Leave the “127.0.0.1” on the mapping for the “pleroma-db” service, as this tells the web application how and where to connect to the Postgres database.
Finally, we are ready to bring up our Pleroma site with the commands:
`docker-compose up -d && docker-compose logs -f`
“docker-compose up -d” tells the Pleroma service to start, and continue running int he background.
“docker-compose logs -f” tells the shell to show the logs of the service as it starts after the initial container is up and running.
You can stop the logs at any time with the CTRL + C hotkey combination, and the service will continue to run in the background.
Now you need to add an admin user:
`docker exec -it pleroma /bin/sh`
`cd`
`./bin/pleroma_ctl user new --password --admin -y`
You can now exit the shell in the container with the `exit` command, and move to your NGinX Proxy Manager (or reverse proxy software of your choice).
## Setting up the Reverse Proxy
Go into your NGinX proxy Manager (or reverse proxy of your choice). Create a new Proxy Host, and give the proxy the domain name you have chosen for your site.
You should have already pointed this domain name to the public IP address where your server is being hosted.
Make sure to press Tab or Enter to make the domain entry a chip in NGinX Proxy Manager. Next, move to the IP Address field and enter the private IP address where your Pleroma server is running. If it is running on the same machine as your NGinX Proxy Manager, you can enter "localhost". Now move to the Port number field, and enter 4000 (unless you changed the port number during the setup process, in which case you should use that port number here.)
Finally, move to the SSL tab, and select "Request a New Certificate" from the drop-down, tick the options for Force SSL, and HTTP/2 support, then enter your email address in the assigned field, and tick the option to accept the LetsEncrypt Terms of Service. Click 'Save'.
The pop-up box should close with no errors. You should now be able to reach your Pleroma server via SSL, and login.
#### Set Pleroma to allow Configuration via the Web UI
From the folder where you docker-compose.yml file is located, use the following command to edit the configuration file:
`nano volumes/pleroma/config.exs`
In the file, you need to add the text below after the
`import config`
line.
```text-plain
config :pleroma, Pleroma.Web.Endpoint,
url: [host: "your-pleroma-url-here", scheme: "https", port: 443]
config :pleroma, Pleroma.Repo,
adapter: Ecto.Adapters.Postgres,
username: "pleroma",
password: "your-db-password-here",
database: "pleroma",
hostname: “pleroma-db”
config :pleroma, configurable_from_database: true
```
Make sure to replace the db-password, and pleroma-url with your Postgres db password, and your Pleroma domain name.
Save and close with CTRL + X, then Y to confirm, then enter the docker container shell with the command:
`docker exec -it pleroma /bin/sh`
You can alternatively use Portainer to access the shell via your web browser - check out the video on how to do it.
and run the commands:
`cd `
`./bin/pleroma_ctl config migrate_to_db`
Give it time to complete.
Now exit the shell, and once again we will edit the configuration file to allow registration to your server, and to federate your server. If you don't want to allow registration, or federation, change the 'true' to 'false' in each place.
Enter the command:
`nano volumes/pleroma/config.exs`
and copy / paste the following below the other text in the configuration file.
```text-plain
config :pleroma, :instance,
registrations_open: true,
federating: true
```
Save your changes wiht CTRL + X, then Y to confirm.
Now restart your Pleroma install with `docker-compose restart`.
Give it a couple of minutes to come fully up, and then go back to your Pleroma site, and refresh. You should now be able to start editing the configuration from the Web UI.
Check out the video for a full guide on getting started.
## Support my Channel and Content
Support my Channel and ongoing efforts through Patreon:
[https://www.patreon.com/bePatron?u=234177](https://www.patreon.com/bePatron?u=234177)
# Databag - Open Source, E2E Encrypted, Federated Chat
# Install, Run, and Federate Databag
I have covered multiple chat applications over the years, and as I was digging through my list of bookmarks I ran across this application that I had put aside unitl it had become a little more mature. It's still quite new, but also in a state where I believe it is ready for more adoption. The developer is responsive to his Github issues for now, and is actively seeking help with design and workflows.
#### What you'll need
- A server to run the application on.
- Docker and Docker-Compose (alternatively Portainer) Installed
- Git Installed
- A Reverse Proxy (I use NGinX Proxy Manager)
- A domain that you own, and can add A-Records (and optionally subdomains) for.
- About 10 minutes of your time.
If you don't want to setup Databag on your home server, or if your ISP blocks you from using ports 80 / 443, then you might want to take a look at [Digital Ocean](https://m.do.co/c/a6a61ae55242 "Digital Ocean - Get a credit to test it out."). They have really inexpensive VPS (Virtual Private Servers) that make it easy to spin up a project just like this one. If you use my [affiliate link](https://m.do.co/c/a6a61ae55242 "Digital Ocean - get a credit to test it out."), you'll get 50 days with $50 - $100 credit to [try out Digital Ocean](https://m.do.co/c/a6a61ae55242 "Digital Ocean - get a credit to try it out."). I only get a credit, and only if you like their service and become a paying user after the credit is done. The server you'd need for Databag is their least expensive (from $4 to $6 a month US).
### Install Docker, Docker-Compose, and NGinX Proxy Manager
#### Installation via a Simple Script
You can easily install Docker-CE, Docker-Compose, Portainer-CE, and NGinX Proxy manager by using this quick install script I created and maintain on Github. Just use the command:
`wget https://gitlab.com/bmcgonag/docker_installs/-/raw/main/install_docker_nproxyman.sh`
To download the script to your desired host.
Change the permissions to make the script executable:
`chmod +x ./install_docker_nproxyman.sh`
and then run the script with the command:
`./install_docker_nproxyman.sh`
When run, the script will prompt you to select your host operating system, then will ask you which bits of software you want to install.
Simply enter 'y' for each thing you want to install.
At some point, you may be asked for your super user (sudo) password as well.
Allow the script to complete installation.
At this point, you might want to log out and back in, as this will allow you to use the `docker` and `docker-compose` commands without the need of `sudo` in front of them.
#### Installing Databag
I like to put my docker applications inside of a single docker folder. First do an `ls` command and make sure you don't already have a folder called "docker".
If you do, then change into that folder:
`cd docker`
If not, then we can create the folder first, and then move into it.
`mkdir docker`
`cd docker`
Now we need to clone the Github repository for Databag. This will create a folder in our current directory called "databag", once it's done we'll move into it and complete our setup for installation. Enter the following command to clone the repository:
`git clone https://github.com/balzack/databag.git`
When it's done cloning the repository, move into the databag/net/container directory with:
`cd databag/net/container`
Again, list the files from this directory with:
`ls`
You'll notice a file called "compose.yaml" in this directory. We want to keep this file, so we'll make a copy of it, then rename this file to keep it as a backup of the original (a good practice anytime you'll be making modifications to a file in any filesystem).
`cp compose.yaml docker-compose.yml`
The command above says copy (`cp`) the file called "compose.yaml" into a new file called "docker-compose.yml".
`mv compose.yaml compose.yaml.bak`
The command above says rename (move `mv`) the file called "compose.yaml" to a new file called "compose.yaml.bak".
Next, we need to edit the docker-compose.yml file. We need to add an environment variable to it so that we can get Admin access to the applications, and create invite links. The invite links allow us to create a user for logging in. We'll use the nano text editor in the command line, but feel free to use any text editor you like. Just make sure it only saves the text you enter, an not extra characters.
The original file will likely look like:
```yaml
version: "3.9"
services:
databag:
container_name: databag
image: balzack/databag:latest
ports:
- "7000:7000"
volumes:
- ./databag-data:/var/lib/databag
```
We need to fix the spacing, keep in mind yaml is space dependent. You must not use tabs. Only spaces. We want to make sure that all indentations are two spaces more than the previous indentation level. Once adjusted the file should look like:
```
version: "3.9"
services:
databag:
container_name: databag
image: balzack/databag:latest
ports:
- "7000:7000"
volumes:
- ./databag-data:/var/lib/databag
```
Next, we need to add a new item at the end of the file on line 10. We'll add two lines, again make sure to use spaces to indent these new lines properly. When you've added them, the file should look like this:
```
version: "3.9"
services:
databag:
container_name: databag
image: balzack/databag:latest
ports:
- "7000:7000"
volumes:
- ./databag-data:/var/lib/databag
environment:
- ADMIN=
```
Replace my password placeholder between the less than and greater than "<" and ">" (removing those symbols) with a password that is long, strong, random, and has numbers letters (upper and lower case), and symbols.
One other adjustment you may, or may not, need to make - is to the port mapping. The part where it says "7000:7000". If your host machine, the machine where you installed docker is already using port 7000 for another service, then you'll want to change the left side of that mapping to some other port number that isn't in use. Just keep in mind what you change it to. You can pick any number up to 65000. So let's say you want that port to be 10203, your mapping would look like
`"10203:7000"`
Finally, now save the file with CTRL + O, then press Enter to confirm, and exit the nano editor with CTRL + X.
#### Download the Docker Images and Start the Server
Let's use two commands concatenated (stuck together) with two ampersands (&&) to bring up our server, and make sure we don't see any errors:
`docker-compose up -d && docker-compose logs -f`
The first command tells docker to pull down the necessary images, and start them up. The second part says when the first part is complete, show me the logs of what is happening on my server. We are just looking for anything that says ERROR or Error, and if we don't see that, but instead see a message that the server is started or listening, we should be good to go.
#### Setup our Reverse Proxy
A reverse proxy isn't necessary if you are running the application on a digital ocean droplet, though you should adjust your port mappings, and you need to know how to get LetsEncrypt certificates, or some other CA Certified certificate for the application to be accessible. So I still suggest using a reverse proxy to help you handle all of that. I use NGinX Proxy Manager (NPM for short). It's anice tool that provides a web GUI (graphical user interface) to keep it easy to setup reverse proxies for you applications. Feel free to use other proxies if you want.
Log into NGinX Proxy Manager, navigate to the Proxies page, and click the button at the top right to add a new proxy host.
In the first line, type the domain / subdomain url you want for your Databag site. I called mine "databag.routemehome.org". I own the domain "routemehome.org". An A-Record is setup on my registrar to point all requests for any subdomain with "routemehome.org" as the domain, to my IP address. Next, we'll enter the IP Address of our application host machine. If you are running NPM on the same docker host as your application, you can enter "localhost" here. Move to the "Port" field, and enter the port you set on the left side of the port mapping. If you left it as 7000, then enter 7000, but if you changed it to another port number, make sure to enter that port here. Tick the options for "Block Common Exploits" and "Websocket Suupport", then move to the "SSL" tab at the top of the pop-up (modal) window.
Now, select "Request a New Certificate" from the first drop-list, then tick the options for "Force SSL" and "HTTP/2 Support". Make sure your email is entered correctly, then tick the option to accept the terms of service. Click 'Save'. Be patient, as LetsEncrypt will be trying to challenge your domain, and make sure it can connect on port 80. It should be able to do this. If it can't you'll get an error, in which case you'll want to make sure your firewall is forwarding ports 80 and 443 to your NPM host IP address on your internal network. If everything is in order, the pop-up will close without any errors, and you'll see the new subdomain in your proxy list with LetsEncrypt in the row.
Click on the subdomain to open it in a new window and you should be directed to your Databag login screen.
[](https://wiki.opensourceisawesome.com/uploads/images/gallery/2023-03/screenshot-from-2023-03-14-14-44-50.png)
The flow the request will follow is seen above. It's important for you to understand all of the parts at play. The request originates from somewhere on the internet, which is then translated to a public IP address, and then forwarded through a firewall to the proxy server, which then handles the request and sends it to the right application server for a response. If the proxy doesn't have a URL entry for the requested URL, it will simply show a default screen to let the user know there's nothing available at the URL provided.
#### Initial Setup as an Admin
Remember that long, strong password I had you make in the docker-compose.yml file? Well, this is when you need it. Click on the gear icon in the upper right of the Databag screen, and you'll be prompted to enter the Admin password. That's where you'll enter the password you created. Once entered, click 'Login', and you'll be taken to a screen with a few icons on it.
[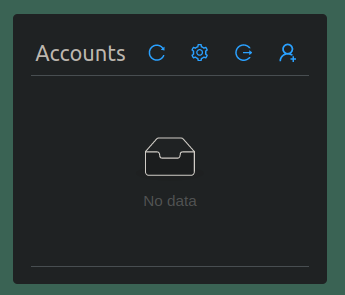](https://wiki.opensourceisawesome.com/uploads/images/gallery/2023-03/screenshot-from-2023-03-14-15-38-51.png)
You can use the little person icon to create an invite link for a new user. The link, can then be sent via various methods available to you, and once clicked, the user will be prompted to create their username and password for the system. You can click the icon that looks like a gear, and you'll be prompted to enter your servers hostname (subdomain / domain name) for federating, as well as a few other options you can set server-wide.
[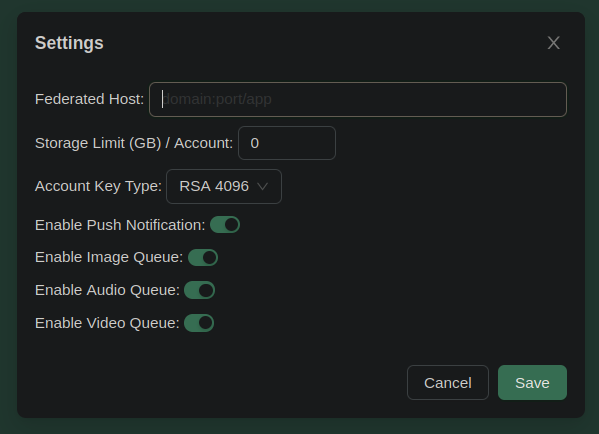](https://wiki.opensourceisawesome.com/uploads/images/gallery/2023-03/screenshot-from-2023-03-14-15-38-35.png)
Once entered, and set, click the 'Save' button to have your server updated.
Now you can login, and / or continue creating invite links for other users.
To search for users on other servers, you'll need the server address, currently there's no central server registry, again the author is attempting to cut down on noise and spam... but maybe a registry will come along eventually.
In the video at the top of the post I show some of the ins and outs of the user interface, like setting up your user profile, searching for other users and adding them as contacts, using the mobile apps on your various devices, and much more. So watch it for all the details.
### Support my Channel and Content
Support my Channel and ongoing efforts through Patreon:
https://www.patreon.com/awesomeopensource
# 3 Great Mastodon Clients
# 3 Mastodon Clients
I'm a pretty big fan of the Fediverse. I'm not a massive social media person beyond Youtube, but I'm just really kind of done with Facebook, Twitter, and even Reddit is starting to rub me the wrong way lately. It's truly not the politics that bother me. I'm a person who believes fully that everyone has the right to their own opinion, as well as the right to express it (with some level of civility), and if we disagree, its ok...we can still have a beer together.
Social Media platforms have just become so laden with "curated" streams of information, which is their way of saying they bubble things up to the top that they think you should see. The fediverse, so far, doesn't do that. It just shows you what's been posted in a reverse order timeline flow. It allows you to just see the people you follow, just see posts on the local server you are a member of, or see posts from the whole federated system of servers. It's really up to you, how much, and what you ingest.
For that reason, I wanted to share some great, simple applications that will allow you to get the most out of Mastodon in 3 really great ways, using three open source apps.
#### The Browser
The best place to begin, at least in my mind, is the easiest to access for most of us. The fediverse was originally built with browsing it through your favorite web browser. Whatever server you end up signing up with, you'll be able to access it, and your various timelines using the web browser. Whether on your desktop, tablet, smartphone (or soon enough AR Goggles), the browser is really a wonderfully simple place to get your feed streaming.
I use the FOSStodon server, you know...being an open source advocate and all, it's a server that speaks to something I'm truly interested in. That, for me, is the key to finding the right server. Find a server that caters to a theme you are interested in. Gaming, Movies, Media, Tech, Literature, Development, and so much more. Just go to [https://joinmastodon.org/servers](https://joinmastodon.org/servers "Find Mastodon Instances using Filters") and start filtering to find a server you want to join. Another option is a wizard based approach to finding a server you might like. Go to [https://instances.social/](https://instances.social/) and clikd the "Start" button, then simply go through the wizard, making the selections that make you happy. After you finish, you'll be provided with a set of servers that you can check into.
#### The CLI (TUI - Terminal User Interface)
The next client I want to present is Tut (pronounced toot, as that's what you do on Mastodon, instead of tweet). Tut is a really nice, clean, simple TUI tool for viewing and interacting with Mastodon. Tut has builds for all different Distributions, as well as a simple binary that can be set as executable and run from the terminal.
[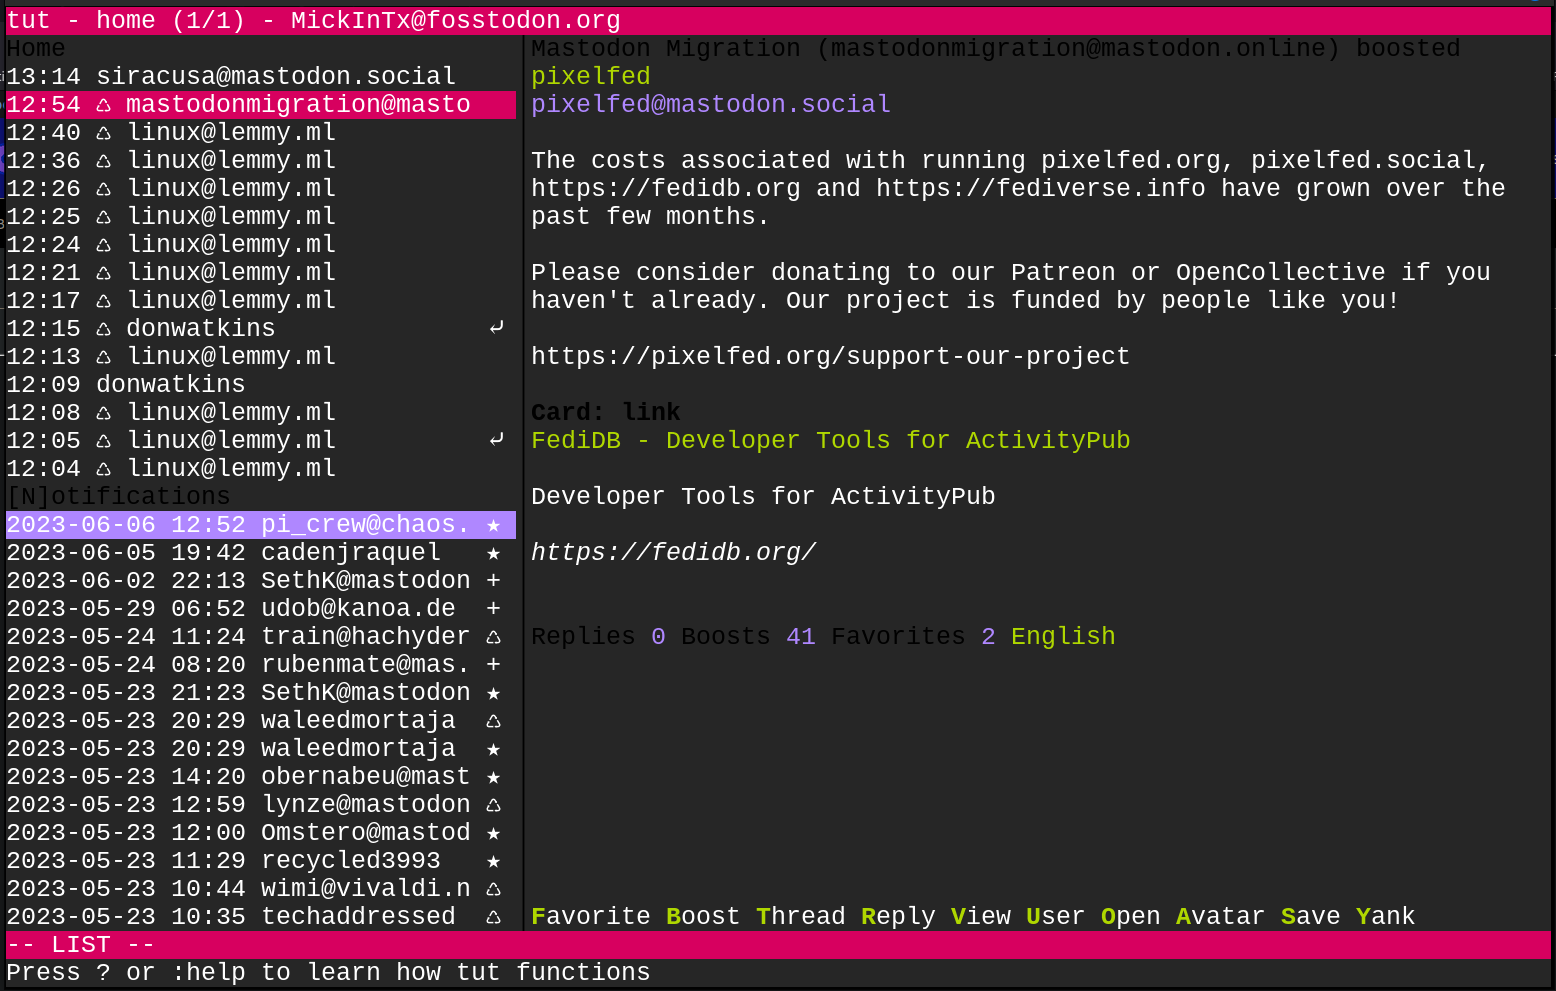](https://wiki.opensourceisawesome.com/uploads/images/gallery/2023-06/image.png)
Using the up and down arrow keys, you can easily scroll through your feed, or alternatively usign the VI or VIM, J and K keys you can navigate around. You can Tab between your feed and your notifications, and for any extra help on how to use the functions, you can just type the question mark symbol "?".
To compose a new post, just type 'c', then go into edit mode with 'e'. Type your post, and press 'Esc' to exit edit mode, then type 'p' to post out to the world.
It's a really quick, and simplified way of keeping up with what's going on.
To install Tut, you can go to its GitHub page, then to the releases page to find multiple filetypes available to you. I downloaded the binary file, moved it into a folder I created and name 'Applications' inside of my home folder. Next, I right clicked on the file in the GUI, and selected 'Properties' from the menu that popped up. From there I went to the permissions tab in the Properties window, and checked the box that said 'Allow executing file as a program'. Alternatively, you can use the command line, and enter the command
`sudo chmod +x /path/to/the/tut-binary-file`
For me the command was:
`sudo chmod +x ~/Applications/tut-amd64`
Next, just run the file from the command line with
`~/Applications/tut-amd64`
or put the Applications folder into your $PATH variable and simply enter the binary name `tut-amd64`.
#### The Desktop Apps
As one might expect, Mastodon has a plethora of desktop options for clients. Many, sadly, are just not great. They are bloated electron apps that are simply displaying the web browser view of your chosen instance, and honestly, if that's what you're after, just use the browser.
The option I'll talk about in this article, and my video above, is a really clean app, that is built on GTK, and is quite a nice user experience in my opinion. Tootle, is an absolutely awesome bit of open source software.
[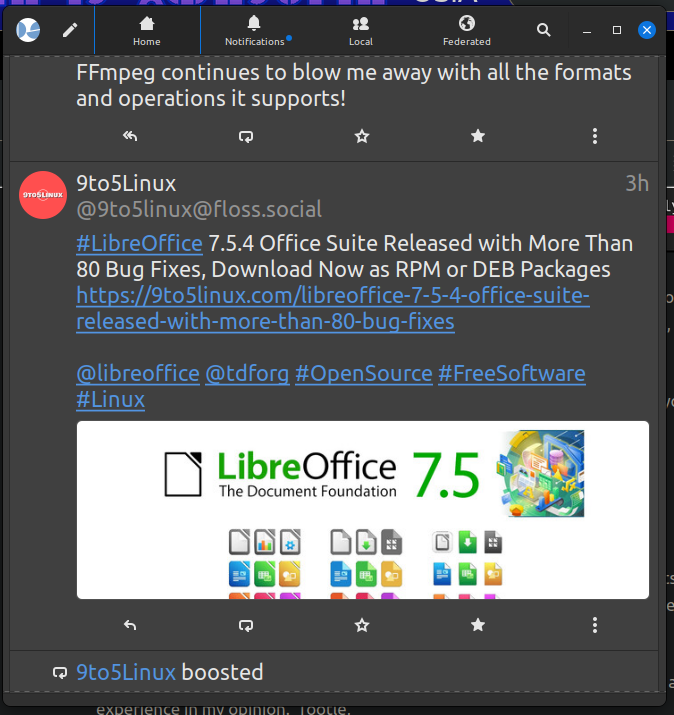](https://wiki.opensourceisawesome.com/uploads/images/gallery/2023-06/QjGimage.png)
Tootle gives you a great single column view of yoru feed, with simple tabbed control to change what you are streaming through at any given time. It's minimalistically powerful. It runs well, and is low on resource usage from my experience with it so far.
You can find out more about [Tootle at its GitHub page](https://github.com/bleakgrey/tootle "Tootle Github Page"). To install Tootle, you can go to your distro's software center or package manager. In my case, it was right there in the software manager ready to be installed as a snap package. Sadly, it appears Tootle is not being developed any longer. The good news is, if you're concerned about ongoing development, there is Tuba, a GTK4 based client, that is being developed actively. You can get it at [https://flathub.org/apps/dev.geopjr.Tuba](https://flathub.org/apps/dev.geopjr.Tuba) And if your distro can install flatpaks, you should be set.
#### Bonus: Mobile Client
For those looking for a great mobile experience, I personally like Mastoot [https://apps.apple.com/us/app/mastoot/id1501485410](https://apps.apple.com/us/app/mastoot/id1501485410) . It's made for iOS for certain, but not sure if they have an Android option, but here is a link for a whole list of options [https://play.google.com/store/apps/details?id=org.joinmastodon.android&hl=en\_US&gl=US&pli=1](https://play.google.com/store/apps/details?id=org.joinmastodon.android&hl=en_US&gl=US&pli=1).
#### Conclusion
First and foremost, come find me on Mastodon. I'm @mickintx@fosstodon.org. Second, get out there and give some of these great options a try. Find a server that has an interest of yours, get a client (or two) that you think you'll enjoy using, and get social.
#### Support My Channel and Content
Support my Channel and ongoing efforts through Patreon:
https://www.patreon.com/awesomeopensource