Note: 1. I own the domain routemehome.org. 2. I have an A-record in the domain DNS set to point to my public IP address. 3. I have my firewall setup to forward traffic on ports 80 and 443 to the host where I run NGINX Proxy Manager.
- In the IP address field, enter either: - The private IP of the host where Headscale is running (if it's on a different host than NGinX Proxy Manager). - “localhost” if Headscale is running on the same host as NGinX Proxy Manager. - In the Port field, Enter the port number you mapped in the first section for Headscale. In my example above is 27896. - Tick the options for “Block Common Exploits” and “Websocket Support”. - Now move to the SSL tab. Select the option “Request a new Certificate” from the drop-down box. - Tick the box for “Force SSL” and "HTTP/2 Support". - Make sure you email is filled in on the field shown, then tick the option for “Accept the LetsEncrypt TOS”. - Click Save. - It may take a few seconds to a minute, but if everything is setup correctly, the pop-up will go away. You should now see your Headscale URL listed, and to the right it should say LetsEncrypt. Now, we need to pull down the Headscale Web UI portion. In the terminal, you'll want to type: `docker compose pull` This will pull down the docker image for headscale-webui. After it's done, you'll need to run `docker compose up -d` This will bring up the headscale-web-ui container. Now we need to modify our NPM entry one more time. In NPM find the line for your headscale entry, and click the 3-dot icon on the right end of that row. Select ‘Edit’ from the options. Move to the ‘Custom Locations’ tab, and click the ‘Add Location’ button. In the “Location” field, we'll add the text `/admin`. Next, enter the same IP on this page as you did on the main page for this entry. Now enter the port you mapped for the host in the headscale-web-ui section of the docker compose. In the example above this would be 5000. Click ‘Save’. Now you should be able to visit your Headscale URL with the /admin on then end, and see the headscale web ui. In my case I would visit [https://headscale.routemehome.org/admin](https://myheadscale.routemehome.org/web) When it first loads you'll see a space to enter an API key. This is because we need to generate an API key for the web ui to use. In the terminal on the Headscale server you'll want to run the command: `docker exec headscale-headscale-1 headscale apikeys create` The command on a non-docker install would be: `headscale apikeys create` Take the API key that is output to the terminal, and copy it. Go back to your headscale-web-ui page, and paste in the API key you just generated. Click ‘Save’. You should see a check mark to the right of the row of buttons, but if not, click the ‘Test API’ button and see if it shows up. If everything went well, you can now view, create, and delete users and devices from the web user interface. ### Is there a Linux GUI for the Desktop Clients? There is a really great open source application called "Trayscale". This application gives almost the exact same options / experience as the Windows / MacOS Tailscale GUI made by Tailscale. You need to first install the Tailscale client on your Linux Desktop using the one-liner command above, or using your package manager for your distro. The one-liner (for convenience) is again: `curl -fsSL https://tailscale.com/install.sh | sh` Once that's installed, you'll want to make your user an operator in Tailscale. `sudo tailscale set --operator=$USER` Now, you can install Trayscale from Flathub with the command: flatpak install flathub dev.deedles.Trayscale flatpak install flathub dev.deedles.Trayscale `flatpak install flathub dev.deedles.Trayscale` This, of course depends on you having installed Flatpak for your distro, as well as setting up Flathub as a repo for Flatpak. You can search the web and find many results on how to do that for your specific distro. Once installed, start Trayscale, and you should see your various devices (including the one you are using, on the left, and clicking on each device will give actions / information in the right pane. [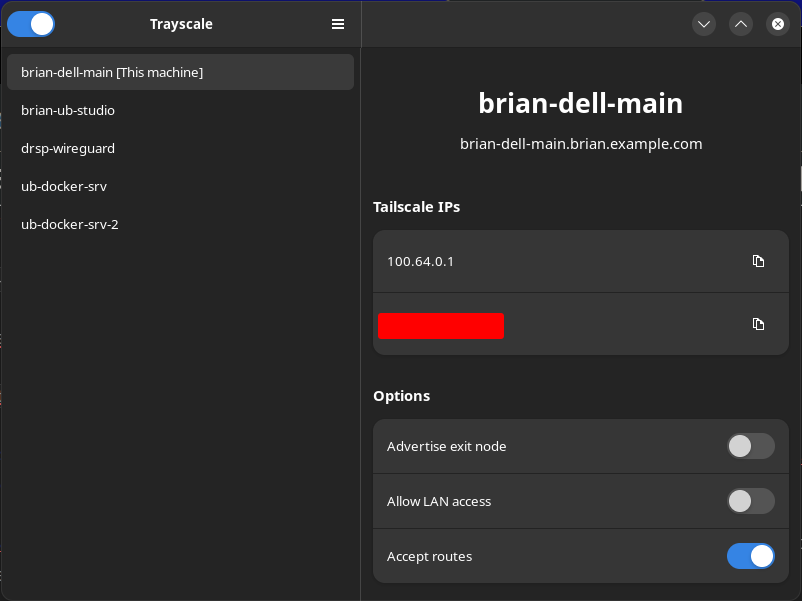](https://wiki.opensourceisawesome.com/uploads/images/gallery/2023-10/image.png) That's it. Trayscale is now up and running on your desktop device. When you close it, it will be minimized to your system tray. ### I want to access a LAN through my Headscale Node on that Network This is something called Subnet Routing in the Tailscale / Headscale world. In this case you want to create a subnet route from your wireguard network into the LAN so you can access all of the machines on that LAN without having to put the Tailscale client on every machine. Tailscale highly recommends putting the client on each device whenever possible as this yields overall better connectivity and performance. Sometimes, however, this simply isn't possible. Printers, PBX Phones, and other devices with a build in OS that can't be (easily) modified or updated may not be able to have the Tailscale client installed, so accessing these devices remotely is useful through a Subnet Route. I showed you haw to do this with Netmaker a while back, and it was admittedly much easier in Netmaker to accomplish this. You simply created an “egress” node from one of the machines connected via the Netmaker netclient, and told it what subnet you wanted access to, and submitted in the web UI, and BOOM! Done. With Headscale / Tailscale it's a bit more involved. First, we need to define a node as our subnet router and tell the node to advertise itself that way to the other nodes on the Headscale network. Next, we need to tell the Headscale server that the node is now defined as a router, and enable that route in the Headscale server. Finally, we need to tell each client node we want to have access to that route that it is able to access that route. Yeah, it's kind of a lot, but not too horrible in the end. 1. Enable IP Forwarding on the node that will be the subnet router. 2. Advertise the Routes on the node you want to allow (the subnet you want to allow access to). 3. List the routes on the Headscale server to make sure they are being advertised 4. Enable the routes on the Headscale server (by default they are not enabled) 5. Accept the routes on the clients you want to allow to access the subnet. Let's get started. #### Enable IP Forwarding This method will vary depending on your Linux distribution, so please check their documentation as well, and always check the Tailscale docs to make sure you are aware of any updates. ```text-plain echo 'net.ipv4.ip_forward = 1' | sudo tee -a /etc/sysctl.conf echo 'net.ipv6.conf.all.forwarding = 1' | sudo tee -a /etc/sysctl.conf sudo sysctl -p /etc/sysctl.conf ``` #### Advertise the Subnet Route(s) on the Node `sudo tailscale up --advertise-routes 192.168.1.0/24 --login-server https://headscale.yourdomain.org` In the above, you would of course replace the IP subnet with the subnet you want to be able to reach, and the login server URL with your headscale server URL. #### List the Routes on your Headscale Server `docker exec headscale-headscale-1 headscale routes list node-name` In the above command, change `node-name` to the actual name of your tailscale node. You can alternatively list all headscale routes with: `docker exec headscale-headscale-1 headscale routes list` You should see something like this, either way: ```text-plain ID | Machine | Prefix | Advertised | Enabled | Primary 1 | my-great-node | 192.168.1.0/24 | true | false | false ``` Notice that the route shows “Advertised”, but is showing `false` for “Enabled” and “Primary”. We need to enable the route on our headscale server now. #### Enable the Route on the Headscale Server `docker exec headscale-headscale-1 headscale routes enable my-great-node -r 1 192.168.16.0/24` The formulaic version of the above command is: `docker exec