OpenSprinkler Pi
When I first bought my home, it had a sprinkler system installed. It had one of the worst hardware controllers I've ever seen. It was very complicated, and there were no instructions to speak of. My goal was to find something better. I started looking, and fortunately found the OpenSprinkler project that also included an option to use a Raspberry Pi board with their hardware controller.
The interface was a very clean, simple, and yet powerful open source web page, and this was exactly what I was looking for.
I made a video on the topic early in my YouTube channels existence, but now I'm selling my home. While this setup has been perfect for me, a fairly tech-savvy person, I'm concerned that the new owners, much less the inspector, won't be able to operate, or figure out how to connect to the device.
New project time! After talking about this with my wife, I started working on a plan. See, the way I had the system setup, was I connected a Raspberry Pi 3 to the controller, and used the built in Wifi of the Raspberry Pi to access the web control interface from my phone or any computer on my network. This, however would require a new owner to know how to connect to the device, change their network settings to match their network information, and so on. Just a heap of issues waiting to happen essentially.
The good news is that I setup the Pi using the Reaspbaerry Pi OS Desktop version, which meant I did have a Desktop to start with. Whew!
Next, I needed a way to make it so the new owners (or an inspector) could easily interact with the controller(s) without having to do any special network setup.
I could used a cheap usb mouse, keyboard, and monitor, but what a clunky setup. Nope, this is the day of touch-screens. And fortunately they are fairly inexpensive to get.
A quick search on Amazon, and I had the screen I needed. Now to setup the Pis, Controllers, and Touch Screen in a way that makes running the sprinklers as easy as possible.
Parts You'll Need
- Reaspberry Pi Model 3B is ideal. https://www.amazon.com/Raspberry-Pi-MS-004-00000024-Model-Board/dp/B01LPLPBS8
- Micro SD Card - https://www.amazon.com/Amazon-Basics-microSDXC-Memory-Adapter/dp/B08TJRVWV1/ref=sr_1_3?crid=26PTDH1KBQRD0&keywords=micro+SD+Card&qid=1707679634&s=electronics&sprefix=micro+sd+card%2Celectronics%2C281&sr=1-3
- OpenSprinkler Pi Controller Board - https://opensprinkler.com - Search Products for OSPI
- 24 Volt Power Supply - include this with your purchase at the link above.
- Touch Screen - https://www.amazon.com/dp/B0776VNW9C?psc=1&ref=ppx_yo2ov_dt_b_product_details
- About an hour of you time.
First, you need to get Raspberry Pi Desktop OS installed on an SD Card. I use Balena Etcher, but you can use any app you want for putting an image on an SD Card. You can download the Raspberry PI OS Desktop version here.
Once imaged, insert the SD card into your Raspberry PI and start it up. You'll need a keyboard, mouse, and monitor connected for this initial setup. But after that, you'll be able to control it remotely.
First, setup your network details such as WiFi SSID and Password, and make sure the Pi connects to your network.
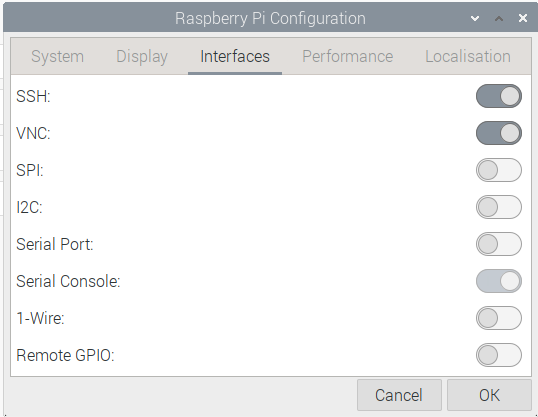
Next, go into the Raspi-Config from the left menu, and enable VNC and SSH in the interfaces section.
After setup, reboot the raspberry Pi. Note: you'll need a screen connected in order to reach the desktop environment, but if you only want to setup the OpenSprinkler Pi web server, it can all be done through SSH, which won't require a monitor.
Installing OpenSprinkler PI
From the Reaspberry PI (either through SSH, or by opening the terminal on the Pi) enter the following to pull down the
OpenSprinkler PI firmware. You'll want to have the OpenSprinkler board connected to the pi at this point.
sudo apt-get update
sudo apt-get install build-essential -y
cd
git clone https://github.com/OpenSprinkler/OpenSprinkler-Firmware.git
cd OpenSprinkler-Firmware
sudo ./build.sh ospi
Once complete, you'll have OSPI running as a web server on the device. Well done!
Setting up our System for Easy Access
In order to keep it as easy as possible for any new owner to use the system, particularly since I setup a touch-screen as the monitor, we need to do a few things.
- Setup our Web Page as a Desktop Shortcut
- Auto-open the application when the system starts
- Make it so our applications open with a single click / touch (instead of double clicking).
- Add an On-screen Keyboard to the system
The easiest way to create a desktop shortcut that will open our web page more like an installed application is to use Chromium. This has a function built right in to create a shortcut on the desktop as an application. Luckily Chromium is the default browser already on the Raspberry PI.
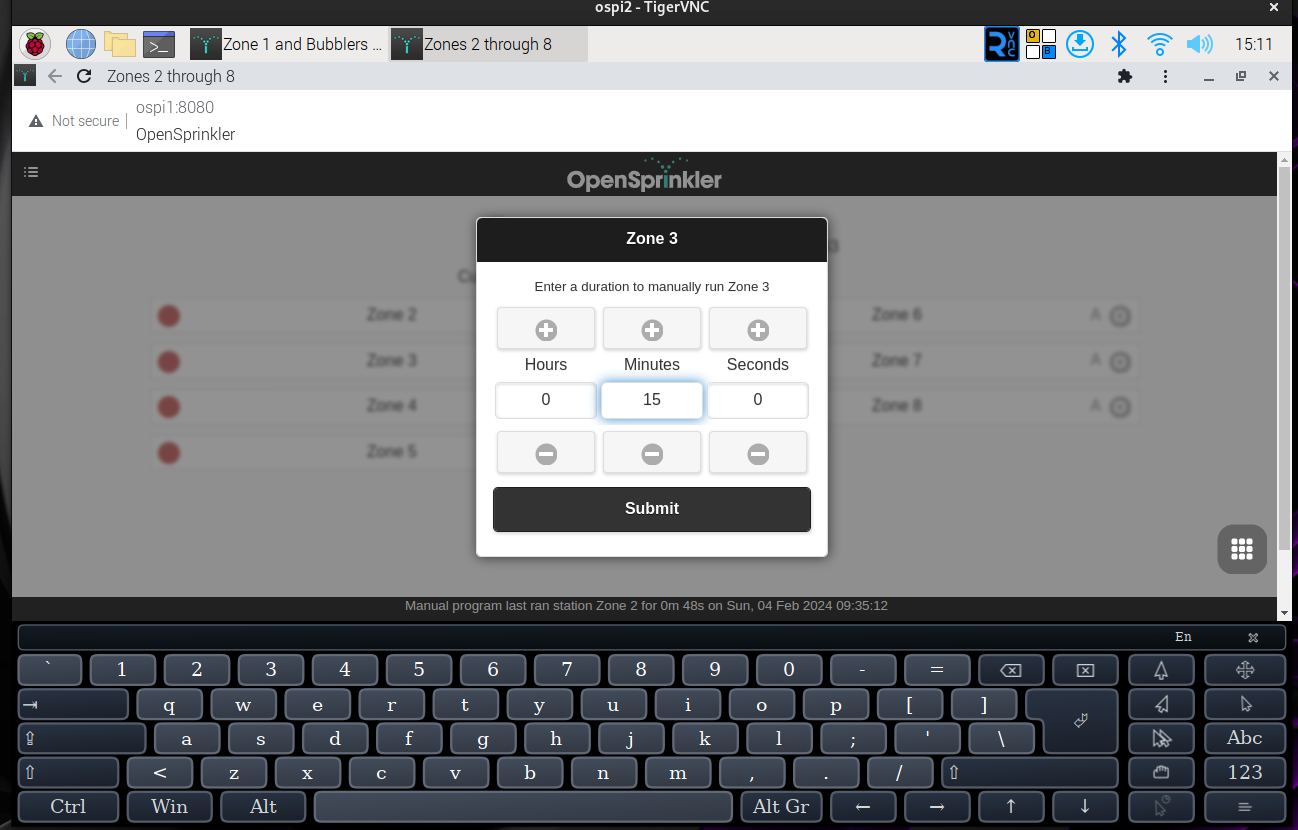
Open Chromium, and type in http://localhost:8080 . This will open your OpenSprinkler web application. If prompted to login, do so. The default password for OS Pi is "opendoor". I highly recommend you change this to something more secure.
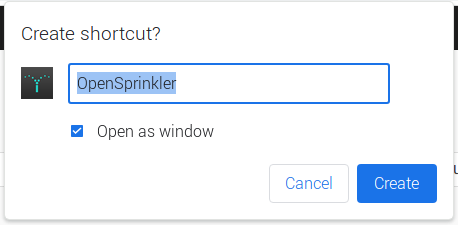
Once logged in, click the t-dot icon in the upper right corner of Chromium. This will expand the menu. From there move down to the "More Tools" option, and then select "Create Shortcut" from the last sub-menu.

In the pop-up, name the shortcut (for instance, "OpenSprinkler", then check the box that says "Open as Window". Click "Create" and you'll see the icon appear on the desktop.
You can now close Chromium, and open the new shortcut. You'll notice all of the extra stuff around the edges, URL bar, Bookmarks bar, etc. are gone, and you are left with a much cleaner page.
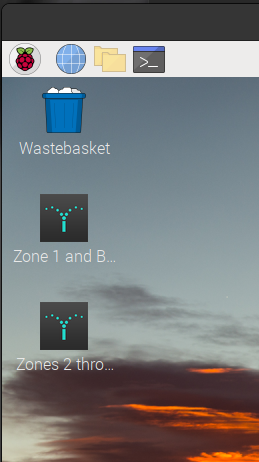
You can right click the icon on the desktop and rename it to something else, if you prefer. In my case, I run 2 of these devices, so I renamed them according to the zones you control with each.
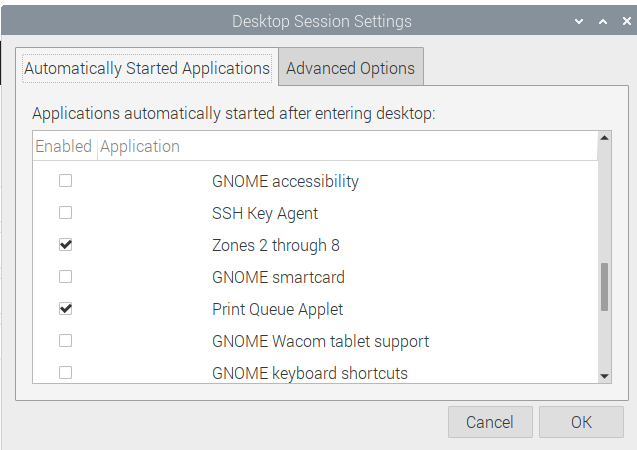
Now, this is all great, but let's make it so that application opens automatically when we reboot the system. This is intended to be an Appliance, so it only makes sense to have it open to the application we intend to use on it.
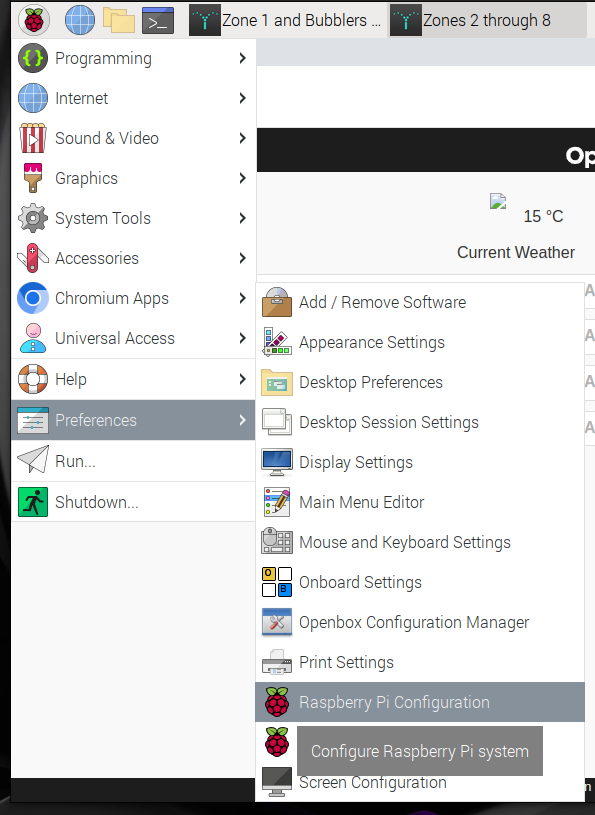
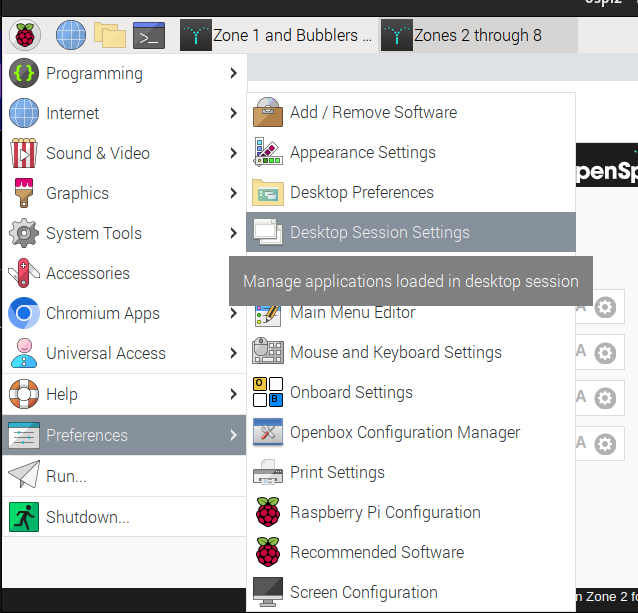
- Go in the Main Menu > Preferences > Main Menu Editor.
- Browse to Main Menu > Preferences, and check the “Desktop Session Settings” box: If it's already checked, leave it checked.
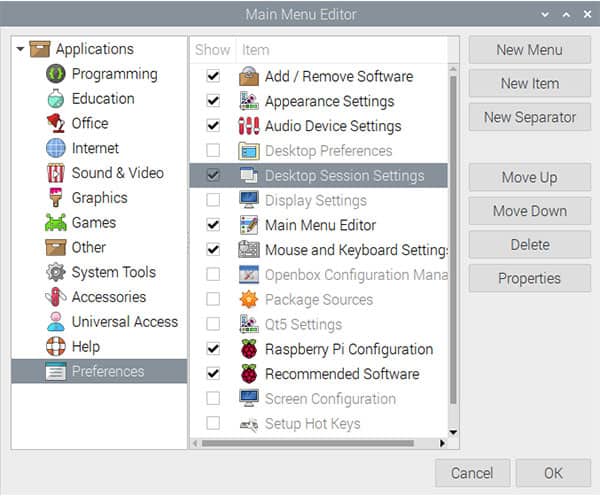
- Close this window and go back to Main Menu > Prefernces, then open Desktop Session Settings
Now check the box to the left of any items you want to open on start up.
Open Our Application with a Single Click / Touch
In a File Manager window, click 'Edit', then scroll down to the option for 'Preferences' and select it.
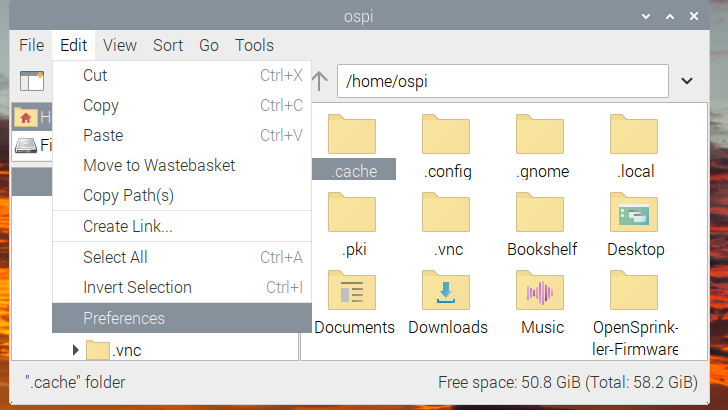
Once open, in the 'Behavior' section, at the top, tick the box for 'Open files with single-click'. Feel free to adjust the timing below the option to something appropriate so you don't accidentally open the twice with a double click. When done, click 'Close'.
Lastly, let's install an on-screen keyboard that we can call up when needed. For this, I selected 'Onboard', and open source on-screen keyboard that has a nice setup of preferences, as well as the ability to program 'quick actions', so you can setup longer commands with a single touch.
sudo apt update
sudo apt install onboard -y
Finally, we'll install once library that helps Onboard behave better on a Raspberry Pi system.
sudo apt install at-spi2-core
Let's reboot our Pi one more time.
sudo reboot
When it comes back up, click the menu icon in the upper left, then go down to Universal Access and select Onboard.
You'll likely see the keyboard pop-up at the top of the screen, but you can drag it by grabbing the key with the four-way arrow on it. Place Onboard where you want it, and resize it by grabbing the window edges. 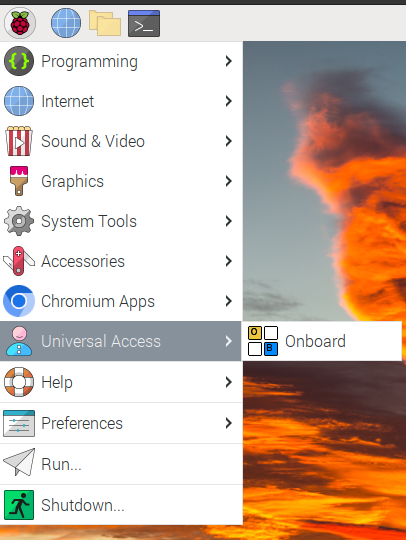
Congratulations! You now have a touchscreen capable, open source, powerfully awesome sprinkler controller for your home.
NOTE: You may want to go back and add Onboard as a startup application using the same method from above. If you don't find it in the list, just go to it in the main menu, then right click, and select 'Show on Desktop'.
My wife and I built a wooden mount for this system, and slotted the mount so the monitor would slide easily down into it and out of it as needed. This system is really way beyond what you'd get from an off the shelf sprinkler controller. Not to mention, you still have the option to hit the web server from your mobile device, and work on your sprinklers, test everything right there in front of it without having to go back and forth to the controller, or having to yell at someone else to turn things on and off.
I'm someone enterprising could build this out more cleanly and beautifully, with a nice 3D printed wall mount for around $ 400.00 US total, and then sell it for $400.00 US to plenty of people.
Hope you enjoyed this, and hope it helps you do something awesome with open source software and hardware.
Support My Channel and Content
Support my Channel and ongoing efforts through Patreon:
https://www.patreon.com/awesomeopensource
No comments to display
No comments to display