Install and Configure Immich
Immich is a photo backup and viewing solution built after the forced payment of Google Photos / shutdown of Google Photos for free.
Additionally, people have realized that their photos being in the cloud isn't always the best practice for privacy. Check out the poor man who was accused of child pornography for taking a photo of his son to send to their teledoc doctor for review.
The desire to take back our privacy and security, to protect our families from the unending scrutiny and usery of these large corporations has grown vast. Immich was designed to give us what we desire. Facial recognition, smart grouping and album creation, location data from our memories, and so much more. It, however, does it in an open source, fully transparent, and positive way that keeps the control over our data in our hands.
What you'll need
-
A server, VM, Container to run Docker-CE and Docker Compose.
-
A storage volume (disk, external drive, NAS, or other system) with enough free space to hold your photo collection, as well as enough space for growth over years of adding more photos and videos.
-
The mobile app for Immich downloaded to your Smart Phone (iOS or Android), though you can also upload photos through the Web UI if you prefer photos taken with a standard camera.
-
(Optional) A fully qualified domain name (FQDN) that you can set DNS A-records for, or sub-domains with the same capability.
-
(Optional) A reverse proxy
-
(Optional, but recommended) A VPN with which to connect back to your Immich Server from your mobile devices.
-
About 20 minutes of your time.
Installing Docker-CE and Docker Compose
To install Docker Community Edition and Docker Compose, we can use a handy one-line command from the docker community group themselves.
curl https://get.docker.com | shYou need to be logged in as a user with sudo privileges, and will be prompted for your sudo password if you haven't entered it recently.
When the script completes, we'll add ourselves to the docker group with the command:
sudo usermod -aG docker $USERYou can now either log out and back in to have the new group take effect, or you can use the two commands below to have the new group take effect without loggin out.
newgrpnewgrp dockerInstalling Immich using Docker Compose
In your host machine or vm / container, we'll create a new folder to hold our immich compose file:
mkdir -p docker/immich
Next, we'll move into that folder:
cd docker/immich
No let's copy down the docker-compose.yml and .evn files that the author was kind enough to create for us.
wget -O docker-compose.yml https://github.com/immich-app/immich/releases/latest/download/docker-compose.ymlNow the .env file we'll fill in our environment variables in:
wget -O .env https://github.com/immich-app/immich/releases/latest/download/example.envNice. A couple of small changes may be necessary, depending on you, and your system. So let's quickly go through those. First, we'll open the .env file and edit a few of the values there.
nano .envThis file should look something like this:
# You can find documentation for all the supported env variables at https://immich.app/docs/install/environment-variables

# The location where your uploaded files are stored
UPLOAD_LOCATION=/mnt/immich

# The location where your database files are stored
DB_DATA_LOCATION=./postgres
# To set a timezone, uncomment the next line and change Etc/UTC to a TZ identifier from this list: https://en.wikipedia.org/wiki/List_of_tz_data>
TZ=America/Chicago

# The Immich version to use. You can pin this to a specific version like "v1.71.0"
IMMICH_VERSION=release

# Connection secret for postgres. You should change it to a random password # Please use only the characters A-Za-z0-9, without special characters or spaces
DB_PASSWORD=<a-l0n6-sTrong-pa5swOrd>

# The values below this line do not need to be changed ################################################################ DB_USERNAME=postgres
DB_DATABASE_NAME=immich
First, the UPLOAD_LOCATION value will be auto-set to a local drive folder inside the directory where you are setting up Immich as ./library. This is fine if you want your photos stored on your main drive, or the same location where you are setting up your Immich instance. Otherwise, you may want to do the following:
-
Identify your storage location. In my case I set it as a mounted volume with much more space
/mnt/immich. You can of course call it anything you like, as long as you know the path to the location. -
Make sure your location is owned by your user and group, then the Immich startup will create the other folders it needs inside of that location.
-
List that path in the .env file for the UPLOAD_LOCATION variable.
Next, you'll likely want to change the DB_PASSWORD value to an actual long (like 32 characters) strong upper case, lower case, and numbers in random order - password.
Once you've made those adjustments, save the .env file with CTRL + O, then confirm by pressing the Enter key, and exit nano with CTRL + X.
Next, we'll look at the docker-compose.yml file. The only item in this file you may need / want to change is the port mapping for the main immich application.
nano docker-compose.yml
Under the 'immich-server' section, you'll want to go down to the 'ports' section. It should look like this:
    ports:
      - 2283:2283
If your VM or Host machine is already using port 2283 for another purpose, you'll want to change the left side port (left of the colon) to an unused port number. If you changed it to 8823 for instance, your new port mapping would look like
    ports:
      - 8823:2283
The other thing you may want to change is to set the 'restart' rule for each container (each section) from 'always' to 'unless-stopped'.
Other than that, you really shouldn't change anything else in this file unless you really know what you're doing with docker compose.
Save your changes with CTRL + O, then press Enter to confirm, and exit the nano editor with CTRL + X.
Let's briefly talk about the ownership and permissions of for your chosen upload folder. In order for the Immich containers to do what they needed, I had to make sure I was the owner, and group-owner of these locations, and that I had set full open permissions on these locations.
drwxrwxrwx brian:brian /mnt/immich
If you run into issues with the system not starting, or logs showing errors and exiting, then this is one of the first things you should check.
Additionally, you may want to remove all volumes created, stop all containers, and remove those containers. Then try again.
Start up Immich with the commands:
docker compose pull
docker compose up -d && docker compose logs -f
Watch the logs. You should see some output, but no errors. If you don't see any errors after a minute or so, then go to your favorite browser, and enter the IP address of your host, and the port number you mapped on the left side of the colon. In my case I didn't change the port so I went to:
I was greeted by the Immich Sign Up form. The first user to sign up for a new site is automatically set as the admin user. After this, you'll create new users through the Web UI when logged in as an Admin user.
Now that you are logged in you can use the site as-is, and upload photos through the user interface, or you can setup your mobile device to send and sync photos automatically.
NOTE: On iOS you'll have an option to set "background checking" which will allow sync in the background, but be aware this only applies after you have run the initial send and sync of photo albums you select.
In my case it was around 5500 photos and videos, and took quite a while to complete. I had to keep the Immich app in the foreground in order for the sync to work. Once the initial sync completes, your subsequent syncs should work in the background, but if you have taken a lot of photos while away from the server (disallowing syncing over cellular) then you may need to open the app for a few minutes to allow all the new photos and / or videos to sync again.
Reverse Proxy Setup
If you'd like to have a fully qualified domain name for your photos, this is the section where we'll go through setting that up. I'm making some assumptions here.
-
You are using NginX Proxy Manager as your reverse proxy.
-
You own a domain that you can create sub-domains and A-records for as needed.
-
You have setup your networking appropriately to be able to reverse proxy services from outside your network.
If you want to use a reverse proxy, but don't yet have something setup that you are familiar with, then definitely check out my video on NGinX Proxy Manager, and the documentation here.
If you are already setup wirh NGinX Proxy Manager, then the process is pretty standard.
-
Click to add a new Proxy Host.
-
In the Domain Name field enter the domain / subdomain you want to have pointing to your Immich install. IN my case I entere "immich.mygreatdomain.com". Of course replace 'mygreatdomain.com' with your actual domain. You could use 'photos.itspictureday.org' etc.
-
In the Forward Hostname / IP field, put the IPv4 address of your server (e.g. 192.168.1.25).
-
In the Port field, enter the port number you mapped in the docker-compose.yml file on the left side. In my case, I didn't change it, so I entered "2283".
-
Enable the 'Block Common Exploits' and 'Websocket Support' options.
-
Now move to the SSL tab on the Add Proxy Host window.
-
Click in the drop-down under SSL Certificate where it says 'None'. Now select the option for 'Request a New Certificate'.
-
Toggle on 'Force SSL', 'HTTP/2 Support', 'HSTS' for both options.
-
Toggle to accept the LetsEncrypt terms of service, and enter you email.
-
Click 'Save'.
-
If, after 30 or seconds, the Add Proxy Host window just closes, you should see your new proxy entry in the list, and it should indicate LetsEncrypt.
-
As a final check, click the three dots at the right end of that row in the grid, and select 'Edit'.
-
Go to the SSL tab, and make sure that all the SSL options are toggled on. Sometimes these disable after save for some odd reason.
You should now be able to click your entry in the table, and it will open your Immich Photos page using SSL encryption from LetsEncrypt.
Log on and Sync from your Mobile
Mobile devices are by far the main way we take photos in this day and age. If, however, you are a person who prefers a dedicated camera, then there is a section for you below.
For you mobile users, we will need the Immich Mobile App. Not being an Android user, I'm assuming these apps essentially work the same way. You'll want to enter you Immich server address (URL or IP). If it can reach your server, you'll be taken to a login screen.
Login with the admin credentials you created.
NOTE: You can create new users from within the Web UI when you are logged in as an administrator.
Once logged into your mobile device. you'll be asked for permissions to access the photos on your device, asked to allow push notifications, and so on. I would just accept these in order to have the best experience, but for those who prefer a bit more control, you can 100% only allow "managed access" to photos on the iOS devices. It's a feature I use with any social media apps, but in this case at least i know it's just talking to the server I setup.
Once you give permissions for the app to access photos, it will start building a timeline based on your devices photos. You'll need to be patient, and keep the app open (at least on iOS). I only have 5500 photos, and it took a solid 10 minutes or so for me to start seeing photos on the device in the app.
After a bit of time, however, you'll want to go and allow "Backup Albums". This is the little cloud icon in the upper right of the device view. When you tap it, you'll be asked to
-
Enable backup of your albums to your server. You should enable this, or it won't send photos to your server.
-
Select which albums should be synced (sent to your server). You can select each album you want synced. In my case I just selected them all, but on my wife's phone we had to be a bit more picky as she uses her phone to take photos for her online sales, and we don't want all of those photos on our Immich server.
-
Once you've done all that, scroll to the bottom, and touch the 'Start Backup' button. Again, on iOS, you need to keep the device open and the app open in order for the initial send to function properly. On Android, you can go to Settings and allow Background Syncing, and it should work. On iOS, you can also go to Setting and allow Background syncing, but this will only work for a few photos at a time before the iOS system stops it from sending. In order to maintain long battery life, iOS keeps apps from doing massive jobs in the background. So the initial sync has to be done with the app foregrounded (open).
Once your initial sync is done, you can close the app, and it will check every 10 to 15 minutes to try and sync any new photos / videos you may have added.
NOTE: There are settings you may want to enable for the following:
-
Background Sync
-
Sync over Wifi
-
Sync while Charging
-
Sync over Cellular Data
I highly recommend you check out all of the settings and enable those that work best for you.
Alternatively Upload from your desktop through the Web UI
If you prefer to use photos you may already have in your desktop computer, you can also upload in bulk through the WebUI. I did this with around 40 photos, and it did go very quickly by comparison to the phone sync.
To upload, just log into your Immich install, and in the upper right you'll find an option to Upload. Click the Upload button, then drag and drop your photos to the space designated on the screen, or click in that space with your mouse to select the photos from a folder on your computer.
Side Note: There is also a CLI for Immich. I did not dive into this yet, and ffrom what I read for those trying to upload tens to hundreds of Gigabytes of photos all at once, the cli did not allow this anymore than the Web UI or Phone Sync. The work, at least from their posts still had to be chunked up. In fact, in my attempt to download photos from my Wife's iCloud, apple only allowed me to download 1000 photos at a time, but I found even that many failed to compress and download, and I instead had to limit myself to around 500 photos / videos at a time. Your mileage may vary.
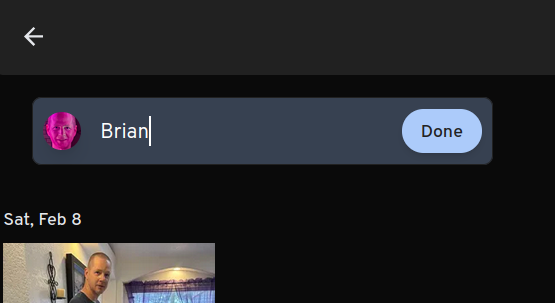
Facial Recognition
As I have continued to use Immich, I have found that the facial recognition is tremendously good. It will show a photo that supposedly has a person in it, and at first I think it's wrong, but as I look, I discover that person really is in it, and they are just in the far background, facing sideways or almost away from the camera in some cases. Absolutely stellar!
You can go into the 'Explore' section, then click on a Face, and on the screen where it shows the Face near the top of the screen, you can edit the Name for that person. I have been going through and naming all the faces in my photos. I really didn't realize I had photos of so many people from over the years.